I had done this quickly back in October when I first tried out the ParseJSON() function in PowerApps, but hadn't gotten around to documenting it up. Then when I went checking to see what everyone else had written up I saw that Shane has done a video on this. Oddly enough, we both approached this nearly identically.
However, I'm dropping this here for posterity and because I always like to read my own typing vs. listening to anybody else's voice. ;)
If you have solved grabbing lots of records from "somewhere" (i.e. SharePoint) and returning it to your PowerApp as a bundle of JSON using Power Automate, the reverse is now what you need to solve for. Fortunately, writing out a lot of updates is similarly easy, but also similarly obtuse per guessing exactly how to get it done. Here's the Q&D on how to make it happen.
Start With a Collection
While this makes it stupid easy when pre-populating a Collection w/ the same column names as you have in SharePoint, it isn't quite as easy when we're working w/ JSON and sending this back to Power Automate. However, it is remarkably unimportant, because you'll do the matching of your PowerApp columns -> SP Columns in Power Automate.
So don't sweat it. Name your columns them whatever you want that keeps you sane.
At this point, you've got a simple record in your Collection that needs a single value updated. It doesn't matter what these columns are named (within reason - don't test me).
Create A VERY Basic Power Automate script
The key here is that you're going to kind of jump back/forth between Power Automate and PowerApps. And strangely enough, these gymnastics are mainly to make it "easier" on you. So follow along and save yourself some time.
So inside your app, click on the Automate icon on the left, click + Add Flow, click Create new Flow, then click Create from blank.
 |
| Sooo many Flows for someone who hates Power Automate |
Delete the PowerApps connector they created for you because the Power Automate team should smack themselves repeatedly, and add in the PowerApps (V2) connector. Then add in a Text value to pass in and name it:
 |
| Why do you hate your users Power Automate team? |
Save this, hit the X to close the Power Automate sub-window, and go back to your PowerApp.
Send Your Power Automate Script Some JSON
Now we just need to call our script and send it the Collection we created above (in JSON format).
You can do this via a Button or wherever you are wanting to call your script. If using a Button, then change the OnSelect code to be the following:
Note: Change the blue text above to reflect your own application.
Now, for the very important part that will save you a ton of time. Hold down the Alt key and click on the button you just created above (or play your application and do whatever it takes to run the above code). This will send a bundle of JSON to your Power Automate script.
Of course, your script doesn't really do anything currently. However, we'll use this when we get back to Power Automate as a template which will simplify our next tasks.
Now, we're going to go back to our Power Automate script we created above, but in the more traditional way, so we can cheat our way through the next step.
Open Your Power Automate Script from https://make.powerautomate.com/
The trick we're going to do here is to navigate to https://make.powerautomate.com/, go to My Flows (default Cloud Flows or Shared With Me if you're sharing work w/ someone else) and click on the name of the new flow we created above.
This will show you the recently run events. Click on the first one that you just created by clicking on your button above. Then click on the PowerApps (V2) connector and it will expand to show you two boxes: Inputs and Outputs. The one on the bottom (Outputs) is what we're going to copy:
 |
| This is your Collection converted to JSON |
NOTE: Your JSON will be different than the image above if you're following along w/ the example. I'm busy pushing out an audit for Kronos users and don't feel like spoon-feeding you any further than I have already. Plus, I'm lazy.
Click inside the box I've highlighted in blue above and hit CTRL-A then CTRL-C. We're copying everything inside that box and then...Edit Your Power Automate Flow
To the upper-right in the Power Automate window, click the Edit word/icon. This gets us into the same flow we were editing back in our PowerApp but through the default method/portal.Click the + sign below your first step and type in parse into the search tool. You'll see Parse JSON as an option below. Click that option.
 |
| Who did you pay Encodian? |
In the new Parse JSON step, select the variable you're getting from PowerApps that you created during the first Power Automate step (Dynamic Content -> itemsToWriteJSON in my example)

Now, the part that saves you so much time. At the bottom of the Parse JSON step, you'll see the button "Generate from Sample. Click that. Then click inside the box that appears and hit CTRL-V to paste the content you copied prior, then click Done. If all goes well, you should then see something similar to this:
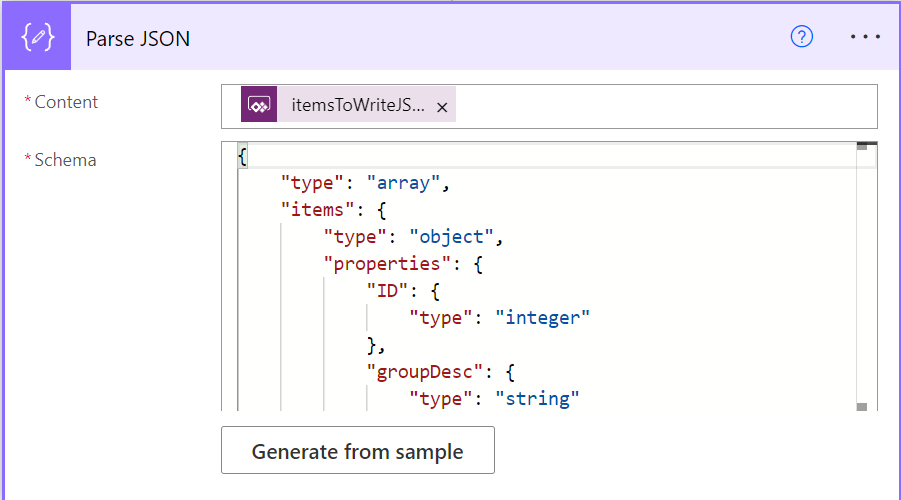
That is your JSON now forming a template that Power Automate now understands and you can select from the Dynamic Content menu for the last step.
Update SharePoint
Now, it's really your choice here. You can drop in a SharePoint Update Item and then follow the steps from that point and it will auto-create the Apply to each control step, or you can manually create it.
The issue that you might not have considered, is that even though you might be used to passing in a single variable, value, or record, JSON can contain many records (as in everything you had in your original Collection).
So when we pass in a JSON representation of our Collection, Power Automate doesn't know if we're dealing with one record or hundreds.
To handle this, we need to include a loop to run through each value and process them individually. While this might seem inefficient in some respects, it does allow us to pass this data out to Power Automate to process while our own app continues. We don't have to wait for this to finish.
NOTE: There are plusses and minuses to this as we don't actively receive any notification (by default) for if this completed properly. But we can add steps to handle this and return the results to our app should we need to.
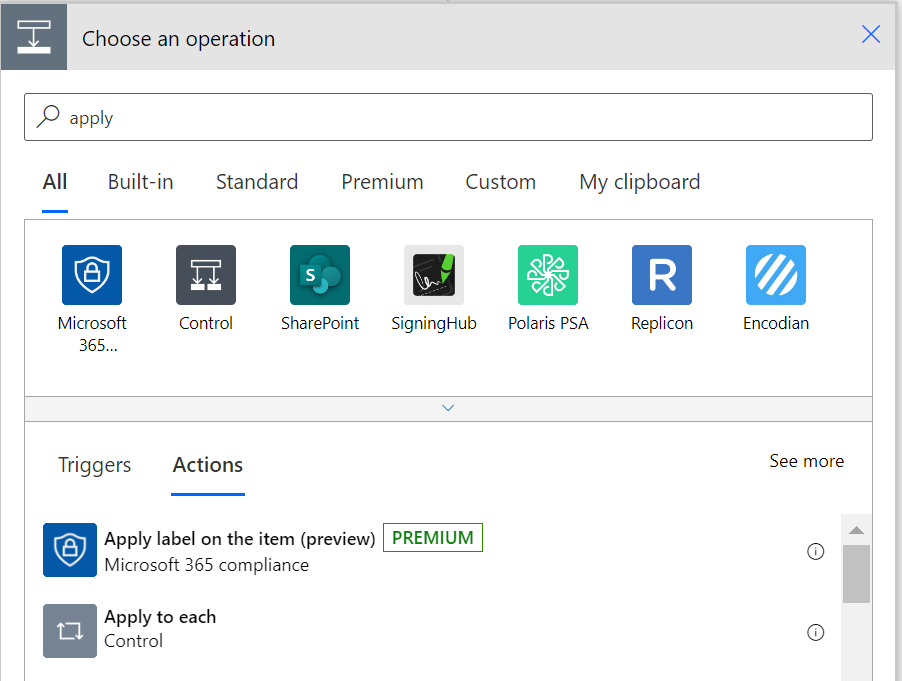
Let's assume you're going to add each step manually. Click the + New Step button under your Parse JSON step to add a new step and type in apply. We're looking for the Apply to each step, so select it and add that to your app.
Then click the Add an action link inside the Apply to each sub-window. In the search box type in update item and select the Sharepoint Update Item step to add.
Once you have that in place, then click in each of your relevant fields and connect them to the appropriate fields from your Parse JSON step.
In the screenshot below, I've included the ID field (which is the SharePoint ID of the item we're going to update) and a keepAccess field (which I am using to track the status of the audit we're running):

As you can see, you don't have to update every value in your list and can selectively include items that you feel need to be updated.
Save your work, and your Power Automate script will now handle writing things directly to SharePoint. You test this by either going back to the previous screen that showed previous runs and resubmit that job, or you can go back to your Power App and click the button again.
Final Thoughts
I am not 100% pleased with how this operates today and hope that Microsoft's team takes some steps to make this simpler.
I do believe that the methodology of having a JSON sample pre-populate our Dynamic Content makes it significantly easier. It just isn't 100% obvious of how to do this by default.
I would also like some understanding of if/when we hit limits on Power Automate to be clearer to the Power App builder. For example, if I pass in 10,000 records, how many will get updated in SharePoint by default? What happens when I hit a limit? Why doesn't Power Automate pass this back to me by default?
Most of this is up to you to handle on your own, and you will need to do some error-handling in those circumstances.
I'll untie that knot in another post.
Hello John!
ReplyDeleteI need your help with some PowerApp coding, like when I was working at IU Health. I lost all my notes, and need some guidance once again.
I'm reachable at edgardortiz86@gmail.com.
Hope to hear from ya' soon!
EJ